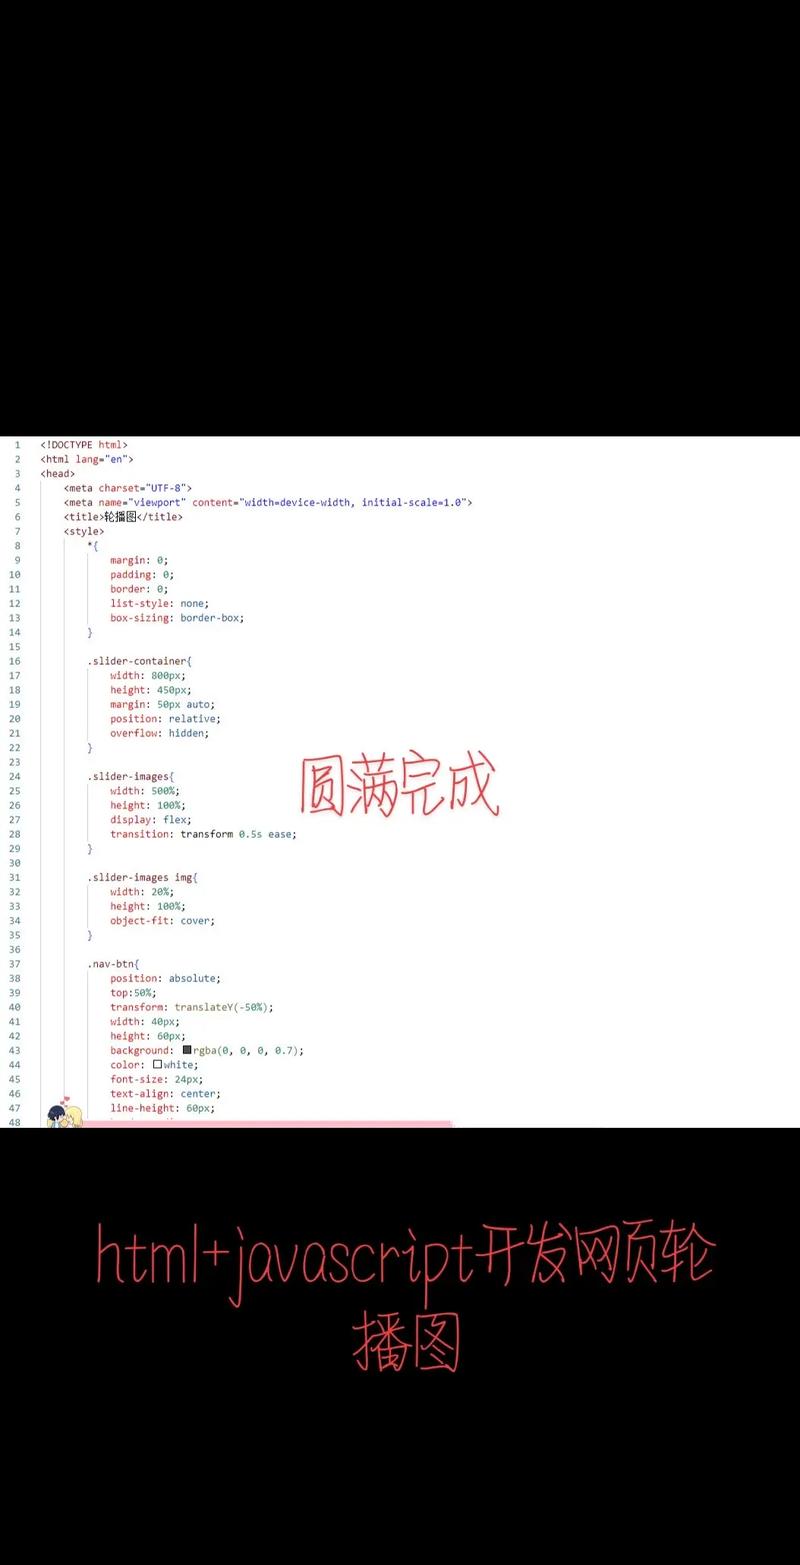
纯CSS实现 (简单、轻量)
这种方法不使用任何JavaScript,完全依靠CSS的 checked 伪类和 transform 属性来实现,优点是代码少、性能好;缺点是交互功能有限(通常不能自动播放和手动切换)。

(图片来源网络,侵删)
核心思路
- HTML结构: 使用一组
<input type="radio">作为“控制器”,每个radio对应一张幻灯片,将所有幻灯片放在一个容器(.slides)内。 - CSS样式:
- 默认隐藏所有幻灯片 (
opacity: 0)。 - 将所有
radio按钮隐藏。 - 当某个
radio被选中时 (checked),通过其兄弟选择器 () 找到对应的幻灯片,并将其显示 (opacity: 1)。 - 使用
transform: translateX()来实现平滑的左右切换效果。
- 默认隐藏所有幻灯片 (
完整代码示例
<!DOCTYPE html>
<html lang="zh-CN">
<head>
    <meta charset="UTF-8">
    <meta name="viewport" content="width=device-width, initial-scale=1.0">纯CSS轮播图</title>
    <style>
        /* 基础样式重置 */
        * {
            margin: 0;
            padding: 0;
            box-sizing: border-box;
        }
        body {
            font-family: -apple-system, BlinkMacSystemFont, 'Segoe UI', Roboto, 'Helvetica Neue', Arial, sans-serif;
            display: flex;
            justify-content: center;
            align-items: center;
            min-height: 100vh;
            background-color: #f0f2f5;
        }
        /* 轮播图容器 */
        .carousel-container {
            position: relative;
            width: 800px;
            max-width: 100%; /* 响应式 */
            overflow: hidden;
            border-radius: 10px;
            box-shadow: 0 10px 30px rgba(0, 0, 0, 0.2);
        }
        /* 幻灯片轨道 */
        .slides {
            display: flex;
            transition: transform 0.5s ease-in-out; /* 切换动画 */
        }
        /* 单张幻灯片 */
        .slide {
            min-width: 100%;
            height: 450px;
            display: flex;
            justify-content: center;
            align-items: center;
            font-size: 3rem;
            color: white;
            background-size: cover;
            background-position: center;
        }
        /* 控制器(单选按钮) */
        .carousel-controls {
            position: absolute;
            bottom: 20px;
            left: 50%;
            transform: translateX(-50%);
            display: flex;
            gap: 10px;
        }
        .carousel-controls input[type="radio"] {
            display: none; /* 隐藏原始按钮 */
        }
        .carousel-controls label {
            width: 15px;
            height: 15px;
            border-radius: 50%;
            background-color: rgba(255, 255, 255, 0.5);
            cursor: pointer;
            transition: background-color 0.3s ease;
        }
        /* 当对应的radio被选中时,改变对应label的样式 */
        .carousel-controls input[type="radio"]:checked + label {
            background-color: white;
        }
        /* 核心逻辑:当radio被选中时,移动幻灯片轨道 */
        #slide1:checked ~ .slides .slide:nth-child(1),
        #slide2:checked ~ .slides .slide:nth-child(2),
        #slide3:checked ~ .slides .slide:nth-child(3) {
            opacity: 1; /* 可以省略,因为我们用transform */
        }
        /* 更优雅的切换方式:通过transform移动整个轨道 */
        #slide1:checked ~ .slides { transform: translateX(0); }
        #slide2:checked ~ .slides { transform: translateX(-100%); }
        #slide3:checked ~ .slides { transform: translateX(-200%); }
        /* 左右箭头 */
        .carousel-nav {
            position: absolute;
            top: 50%;
            transform: translateY(-50%);
            width: 100%;
            display: flex;
            justify-content: space-between;
            padding: 0 20px;
            pointer-events: none; /* 让点击事件穿透到下面的label */
        }
        .carousel-nav label {
            width: 50px;
            height: 50px;
            background-color: rgba(0, 0, 0, 0.5);
            border-radius: 50%;
            display: flex;
            justify-content: center;
            align-items: center;
            color: white;
            font-size: 24px;
            cursor: pointer;
            pointer-events: all; /* 确保箭头本身可点击 */
            transition: background-color 0.3s ease;
        }
        .carousel-nav label:hover {
            background-color: rgba(0, 0, 0, 0.8);
        }
        #prev1:checked ~ .carousel-nav label[for="prev1"],
        #prev2:checked ~ .carousel-nav label[for="prev2"],
        #prev3:checked ~ .carousel-nav label[for="prev3"] {
            display: none; /* 简单处理:隐藏前一张箭头在第一张 */
        }
        #next1:checked ~ .carousel-nav label[for="next3"],
        #next2:checked ~ .carousel-nav label[for="next1"],
        #next3:checked ~ .carousel-nav label[for="next2"] {
            display: none; /* 简单处理:隐藏后一张箭头在最后一张 */
        }
    </style>
</head>
<body>
    <div class="carousel-container">
        <!-- 控制器 -->
        <input type="radio" name="carousel" id="slide1" checked>
        <input type="radio" name="carousel" id="slide2">
        <input type="radio" name="carousel" id="slide3">
        <!-- 左右箭头导航 -->
        <div class="carousel-nav">
            <label for="prev1">‹</label>
            <label for="next1">›</label>
        </div>
        <!-- 幻灯片轨道 -->
        <div class="slides">
            <div class="slide" style="background-image: url('https://images.unsplash.com/photo-1558979158-65a1eaa08691?ixlib=rb-1.2.1&ixid=MnwxMjA3fDB8MHxwaG90by1wYWdlfHx8fGVufDB8fHx8&auto=format&fit=crop&w=1770&q=80');">Slide 1</div>
            <div class="slide" style="background-image: url('https://images.unsplash.com/photo-1572276596237-5db2c3e16c5d?ixlib=rb-1.2.1&ixid=MnwxMjA3fDB8MHxwaG90by1wYWdlfHx8fGVufDB8fHx8&auto=format&fit=crop&w=1770&q=80');">Slide 2</div>
            <div class="slide" style="background-image: url('https://images.unsplash.com/photo-1507525428034-b723a9ce6890?ixlib=rb-1.2.1&ixid=MnwxMjA3fDB8MHxwaG90by1wYWdlfHx8fGVufDB8fHx8&auto=format&fit=crop&w=1770&q=80');">Slide 3</div>
        </div>
        <!-- 底部指示器 -->
        <div class="carousel-controls">
            <input type="radio" name="carousel-indicators" id="indicator1" checked>
            <label for="indicator1"></label>
            <input type="radio" name="carousel-indicators" id="indicator2">
            <label for="indicator2"></label>
            <input type="radio" name="carousel-indicators" id="indicator3">
            <label for="indicator3"></label>
        </div>
    </div>
</body>
</html>
原生JavaScript实现 (灵活、功能强大)
这种方法使用原生JavaScript来控制轮播图,可以实现自动播放、手动切换、触摸滑动等复杂功能。
核心思路
- HTML结构: 更简洁,只需一个包含所有幻灯片图片的容器。
- CSS样式:
- 将所有幻灯片设置为绝对定位,并水平排列。
- 设置容器为相对定位,并隐藏溢出部分。
- JavaScript逻辑:
- 获取所有幻灯片元素和指示器元素。
- 定义当前幻灯片的索引。
- 编写一个
showSlide(index)函数,用于切换到指定索引的幻灯片(通过改变transform: translateX)。 - 编写一个
nextSlide()和prevSlide()函数,用于切换到下一张或上一张。 - 使用
setInterval实现自动播放。 - 添加触摸事件(
touchstart,touchmove,touchend)以支持移动端滑动。
完整代码示例
<!DOCTYPE html>
<html lang="zh-CN">
<head>
    <meta charset="UTF-8">
    <meta name="viewport" content="width=device-width, initial-scale=1.0">JS轮播图</title>
    <style>
        * {
            margin: 0;
            padding: 0;
            box-sizing: border-box;
        }
        body {
            font-family: -apple-system, BlinkMacSystemFont, 'Segoe UI', Roboto, 'Helvetica Neue', Arial, sans-serif;
            display: flex;
            justify-content: center;
            align-items: center;
            min-height: 100vh;
            background-color: #f0f2f5;
        }
        .carousel-wrapper {
            position: relative;
            width: 800px;
            max-width: 100%;
            overflow: hidden;
            border-radius: 10px;
            box-shadow: 0 10px 30px rgba(0, 0, 0, 0.2);
        }
        .carousel {
            display: flex;
            transition: transform 0.5s ease-in-out;
            height: 450px;
        }
        .carousel-slide {
            min-width: 100%;
            height: 100%;
            background-size: cover;
            background-position: center;
        }
        /* 指示器 */
        .carousel-indicators {
            position: absolute;
            bottom: 20px;
            left: 50%;
            transform: translateX(-50%);
            display: flex;
            gap: 10px;
        }
        .indicator {
            width: 15px;
            height: 15px;
            border-radius: 50%;
            background-color: rgba(255, 255, 255, 0.5);
            cursor: pointer;
            transition: background-color 0.3s ease;
        }
        .indicator.active {
            background-color: white;
        }
        /* 左右箭头 */
        .carousel-nav {
            position: absolute;
            top: 50%;
            transform: translateY(-50%);
            width: 100%;
            display: flex;
            justify-content: space-between;
            padding: 0 20px;
        }
        .carousel-nav button {
            width: 50px;
            height: 50px;
            border-radius: 50%;
            background-color: rgba(0, 0, 0, 0.5);
            color: white;
            border: none;
            font-size: 24px;
            cursor: pointer;
            transition: background-color 0.3s ease;
        }
        .carousel-nav button:hover {
            background-color: rgba(0, 0, 0, 0.8);
        }
    </style>
</head>
<body>
    <div class="carousel-wrapper">
        <div class="carousel">
            <div class="carousel-slide" style="background-image: url('https://images.unsplash.com/photo-1558979158-65a1eaa08691?ixlib=rb-1.2.1&ixid=MnwxMjA3fDB8MHxwaG90by1wYWdlfHx8fGVufDB8fHx8&auto=format&fit=crop&w=1770&q=80');"></div>
            <div class="carousel-slide" style="background-image: url('https://images.unsplash.com/photo-1572276596237-5db2c3e16c5d?ixlib=rb-1.2.1&ixid=MnwxMjA3fDB8MHxwaG90by1wYWdlfHx8fGVufDB8fHx8&auto=format&fit=crop&w=1770&q=80');"></div>
            <div class="carousel-slide" style="background-image: url('https://images.unsplash.com/photo-1507525428034-b723a9ce6890?ixlib=rb-1.2.1&ixid=MnwxMjA3fDB8MHxwaG90by1wYWdlfHx8fGVufDB8fHx8&auto=format&fit=crop&w=1770&q=80');"></div>
        </div>
        <div class="carousel-indicators">
            <!-- 指示器将通过JS动态生成 -->
        </div>
        <div class="carousel-nav">
            <button id="prevBtn">‹</button>
            <button id="nextBtn">›</button>
        </div>
    </div>
    <script>
        document.addEventListener('DOMContentLoaded', () => {
            const carousel = document.querySelector('.carousel');
            const slides = document.querySelectorAll('.carousel-slide');
            const indicatorsContainer = document.querySelector('.carousel-indicators');
            const prevBtn = document.getElementById('prevBtn');
            const nextBtn = document.getElementById('nextBtn');
            let currentIndex = 0;
            const totalSlides = slides.length;
            let autoPlayInterval;
            // 创建指示器
            for (let i = 0; i < totalSlides; i++) {
                const indicator = document.createElement('div');
                indicator.classList.add('indicator');
                if (i === 0) indicator.classList.add('active');
                indicator.addEventListener('click', () => goToSlide(i));
                indicatorsContainer.appendChild(indicator);
            }
            const indicators = document.querySelectorAll('.indicator');
            // 更新轮播图位置
            function updateCarousel() {
                carousel.style.transform = `translateX(-${currentIndex * 100}%)`;
                // 更新指示器状态
                indicators.forEach((ind, i) => {
                    ind.classList.toggle('active', i === currentIndex);
                });
            }
            // 跳转到指定幻灯片
            function goToSlide(index) {
                currentIndex = index;
                updateCarousel();
                resetAutoPlay();
            }
            // 下一张
            function nextSlide() {
                currentIndex = (currentIndex + 1) % totalSlides;
                updateCarousel();
                resetAutoPlay();
            }
            // 上一张
            function prevSlide() {
                currentIndex = (currentIndex - 1 + totalSlides) % totalSlides;
                updateCarousel();
                resetAutoPlay();
            }
            // 自动播放
            function startAutoPlay() {
                autoPlayInterval = setInterval(nextSlide, 3000); // 每3秒切换一次
            }
            // 重置自动播放
            function resetAutoPlay() {
                clearInterval(autoPlayInterval);
                startAutoPlay();
            }
            // 事件监听
            nextBtn.addEventListener('click', nextSlide);
            prevBtn.addEventListener('click', prevSlide);
            // 触摸滑动支持
            let startX = 0;
            let endX = 0;
            carousel.addEventListener('touchstart', (e) => {
                startX = e.touches[0].clientX;
                clearInterval(autoPlayInterval); // 滑动时暂停自动播放
            });
            carousel.addEventListener('touchmove', (e) => {
                endX = e.touches[0].clientX;
            });
            carousel.addEventListener('touchend', () => {
                const threshold = 50; // 滑动阈值
                if (startX - endX > threshold) {
                    nextSlide(); // 向左滑动,下一张
                } else if (endX - startX > threshold) {
                    prevSlide(); // 向右滑动,上一张
                } else {
                    resetAutoPlay(); // 没有有效滑动,恢复自动播放
                }
            });
            // 启动自动播放
            startAutoPlay();
        });
    </script>
</body>
</html>
使用专业库 (快速、功能丰富)
对于生产环境,使用成熟的轮播图库是最高效、最可靠的选择,它们经过了大量测试,兼容性好,功能强大且易于定制。
这里以 Swiper 为例,它是目前最流行、功能最全面的轮播图库之一。
核心思路
- 引入库: 通过CDN引入Swiper的CSS和JS文件。
- HTML结构: 使用Swiper官方推荐的HTML结构。
- 初始化: 在JavaScript中初始化Swiper实例。
完整代码示例
<!DOCTYPE html>
<html lang="zh-CN">
<head>
    <meta charset="UTF-8">
    <meta name="viewport" content="width=device-width, initial-scale=1.0">Swiper轮播图</title>
    <!-- Swiper CSS -->
    <link rel="stylesheet" href="https://cdn.jsdelivr.net/npm/swiper@10/swiper-bundle.min.css" />
    <style>
        * {
            margin: 0;
            padding: 0;
            box-sizing: border-box;
        }
        body {
            font-family: -apple-system, BlinkMacSystemFont, 'Segoe UI', Roboto, 'Helvetica Neue', Arial, sans-serif;
            display: flex;
            justify-content: center;
            align-items: center;
            min-height: 100vh;
            background-color: #f0f2f5;
        }
        .swiper {
            width: 800px;
            max-width: 100%;
            height: 450px;
            border-radius: 10px;
            box-shadow: 0 10px 30px rgba(0, 0, 0, 0.2);
        }
        .swiper-slide {
            display: flex;
            justify-content: center;
            align-items: center;
            font-size: 3rem;
            color: white;
            background-size: cover;
            background-position: center;
        }
    </style>
</head>
<body>
    <!-- Swiper -->
    <div class="swiper mySwiper">
        <div class="swiper-wrapper">
            <div class="swiper-slide" style="background-image: url('https://images.unsplash.com/photo-1558979158-65a1eaa08691?ixlib=rb-1.2.1&ixid=MnwxMjA3fDB8MHxwaG90by1wYWdlfHx8fGVufDB8fHx8&auto=format&fit=crop&w=1770&q=80');">Slide 1</div>
            <div class="swiper-slide" style="background-image: url('https://images.unsplash.com/photo-1572276596237-5db2c3e16c5d?ixlib=rb-1.2.1&ixid=MnwxMjA3fDB8MHxwaG90by1wYWdlfHx8fGVufDB8fHx8&auto=format&fit=crop&w=1770&q=80');">Slide 2</div>
            <div class="swiper-slide" style="background-image: url('https://images.unsplash.com/photo-1507525428034-b723a9ce6890?ixlib=rb-1.2.1&ixid=MnwxMjA3fDB8MHxwaG90by1wYWdlfHx8fGVufDB8fHx8&auto=format&fit=crop&w=1770&q=80');">Slide 3</div>
            <div class="swiper-slide" style="background-image: url('https://images.unsplash.com/photo-1546435100-9084c43d49ae?ixlib=rb-1.2.1&ixid=MnwxMjA3fDB8MHxwaG90by1wYWdlfHx8fGVufDB8fHx8&auto=format&fit=crop&w=1770&q=80');">Slide 4</div>
            <div class="swiper-slide" style="background-image: url('https://images.unsplash.com/photo-1603796830978-3fe27a6b14c7?ixlib=rb-1.2.1&ixid=MnwxMjA3fDB8MHxwaG90by1wYWdlfHx8fGVufDB8fHx8&auto=format&fit=crop&w=1770&q=80');">Slide 5</div>
        </div>
        <!-- 如果需要分页器 -->
        <div class="swiper-pagination"></div>
        <!-- 如果需要导航按钮 -->
        <div class="swiper-button-next"></div>
        <div class="swiper-button-prev"></div>
        <!-- 如果需要滚动条 -->
        <div class="swiper-scrollbar"></div>
    </div>
    <!-- Swiper JS -->
    <script src="https://cdn.jsdelivr.net/npm/swiper@10/swiper-bundle.min.js"></script>
    <!-- 初始化Swiper -->
    <script>
        var swiper = new Swiper(".mySwiper", {
            // 核心配置
            loop: true, // 循环模式
            autoplay: {
                delay: 2500, // 自动切换时间间隔,单位ms
                disableOnInteraction: false, // 用户操作后是否停止自动切换
            },
            // 分页器
            pagination: {
                el: ".swiper-pagination",
                clickable: true, // 分页器可点击
            },
            // 导航按钮
            navigation: {
                nextEl: ".swiper-button-next",
                prevEl: ".swiper-button-prev",
            },
            // 滚动条
            scrollbar: {
                el: ".swiper-scrollbar",
            },
            // 响应式断点
            breakpoints: {
                640: {
                    slidesPerView: 1,
                },
                768: {
                    slidesPerView: 2,
                },
                1024: {
                    slidesPerView: 3,
                },
            }
        });
    </script>
</body>
</html>
总结与选择建议
| 特性 | 纯CSS实现 | 原生JS实现 | 专业库 |
|---|---|---|---|
| 实现复杂度 | 低 | 中 | 低(引入后) |
| 功能丰富度 | 非常有限 | 强大 | 极其强大 |
| 性能 | 最好 | 良好 | 良好(库有优化) |
| 可维护性 | 差(逻辑耦合在CSS中) | 好 | 优秀 |
| 兼容性 | 依赖现代浏览器CSS特性 | 依赖现代浏览器JS | 库本身处理兼容性 |
| 扩展性 | 差 | 好 | 非常好 |
| 适用场景 | 极其简单的展示,或学习CSS技巧 | 需要自定义逻辑、不引入第三方库的项目 | 绝大多数商业项目 |
如何选择?

(图片来源网络,侵删)
- 如果你只是做一个非常简单的、不需要任何交互的展示,并且想保持代码量最少,可以考虑纯CSS方案。
- 如果你对性能有极致要求,或者项目不允许引入第三方库,并且需要一些基本的交互(如自动播放、左右切换),那么原生JS方案是很好的选择。
- 对于任何正式的、商业级的网站或应用,强烈推荐使用专业库(如Swiper),它能帮你省去大量的开发和调试时间,并提供稳定、流畅、功能丰富的用户体验。
(图片来源网络,侵删)


